How to Bend Wood for Guitars
A common question is “how do you bend wood”? The simple answer is with steam. The heat and moisture function to soften the wood, making it flexible. This article shows two methods uaws in the shop to bend wood for guitars. One uses water and clamps and the other uses a steam blanket and an adjustable Fox bending machine.
Background
Wood is composed of three main parts, cellulose, hemicellulose and lignin. The first two absorb water easily and form the structure of the tree. They run perpendicular to each other making a dense gird. The last one, lignin, is responsible for the strength of the tree. It is interspersed between the cells and links the cellulose together adding strength and support. Lignin doesn’t absorb water easily and makes it possible for it to be wicked to the necessary cells.
At the base of a tree there will be higher percentage of lignin to the other components. This makes sense as the base of the tree must be stronger because it holds more weight. A branch of the tree however contains a smaller amount of lignin because it is fighting gravity to grow and doesn’t need the added strength.
As a tree ages it goes through many stages. It starts in the ground and grows large. A tree can be 100 to who knows how many years old. While it’s growing the roots suck up water from the ground. This works as a coolant for the plant. It dissipates the heat created by the growth of new cells. The moisture content of the wood is at its most here. Once the tree is chopped down It stops this process. The internal moisture content is set at this point and it can only go down.
If we take a small branch, it will bend with no trouble. We can twist it and turn it into a circle. This is because it is both well hydrated and there is little lignin present, making it less rigid. Once that twig dries out it will snap when bent.
Next the wood is sawn into usable boards and then kiln dried. When the wood still has a high-water content, it’s considered “green”. The drying process makes the wood usable. It is brought down to a moisture content that makes the wood workable. If it is too green than it will compress while in use and shrink. For guitar making we want dry wood it has many useful properties. It’s hard and stiff, among others. Yet it loses that bending ability. To be successful, we must soften the wood for bending.
The wood needs to be convinced to become a guitar. It has spent years and years as a tree and only know one shape. For this reason, going slow will make or break the success of the project.
Bending Wood
The important part of knowing how bend wood for guitar sides is applying pressure to the wood. Whether this is a roller or with clamps, it is a necessity. Something needs to convince the sides to take the shape that we want it to. Sometimes it’s necessary to make a tight turn, so it’s important to apply consistent pressure at each point. Once the wood has taken the new shape it will keep that shape.
We can think of the lignin as a thermoplastic. It is made up of a grid of semi-uniform units linked together. The same way that plastic will deform when heated, so will the lignin in the wood. If we were to only heat the wood, then we would be counting on the internal parts so be heated by the conduction from the outer sides. We need every pore of the wood to be at an even temperature. Therefore, water is introduced. It permeates the cells and wraps around the non-water absorbing lignin, giving full contact for the heat to spread. The amount of water needed doesn’t need to be anymore than what will saturate the wood.
Three caveats to consider:
- Some pieces will never bend. They are too thick in certain sections. It’s possible to go at a turtle’s pace to make these bends, but it is a challenge. The wood must be less than a quarter inch to give the bend a good chance of success.
- A sharp edge will never be possible to bend to shape. There is a cutoff radius of curvature for each piece depending on the size, shape and species.
- Some species are harder to bend than others. Zebra wood is difficult because it wants to split where the streaks are. It is important to experiment with different types, sizes and shapes.
There are two methods of wood bending to be shown. How to bend wood with heat and water and how to bend wood with less heat and mainly water. One will be with a fox bending machine and the other will be with clamps and a jig.
Clamps
The first method that I’ll show uses tepid water, a sink, jig, oven, and clamps. Quite simple compared to using a steam box, bending iron, heating pad or other equipment. This process is best used on a jig with a natural radius of curvature. The wood can make some dramatic bends despite this.
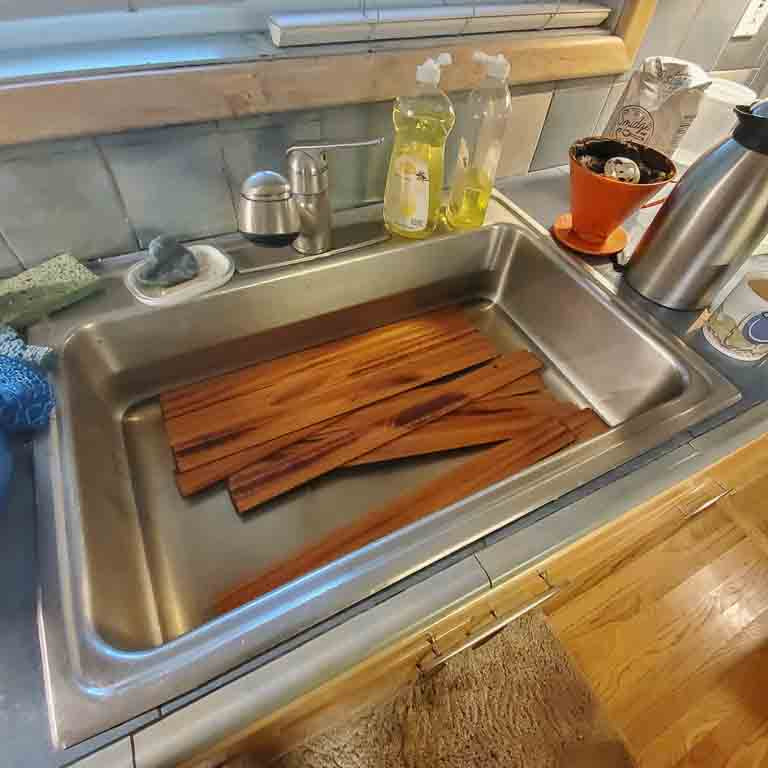
The strips of wood are soaked in water. It can be warm but will cool down over time. This step doesn’t add any heat to the wood, it’s only to make the water absorb through it. The pieces are left in the sink for about an hour. It can be left in longer but at a certain point the wood has absorbed all the water that it’s able to. The strips are thin enough that this doesn’t take a long time. After the hour is up the strips are tested by giving them a little bend. If it’s pliable then they can be taken out. If they are still tough, then time to soak for longer. The braces need to bend enough to fit into our forms. The forms have nice gentle curves so it’s not asking the wood to bend far. It’s much less than bending the upper bout of the sides, a notorious section.
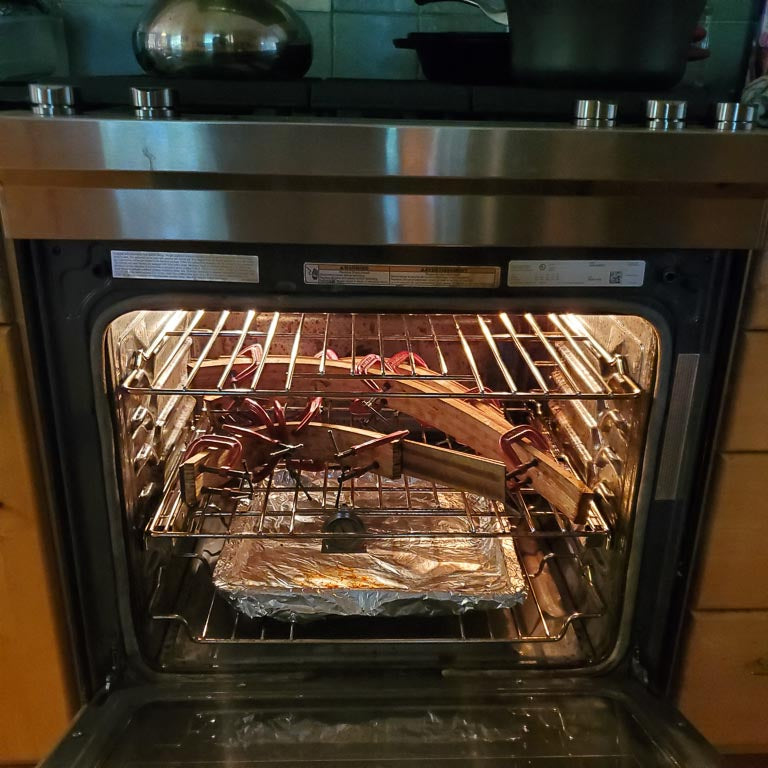
The four pieces are clamped to one end of the jig. Then a clamp is applied two inches up, then another is clamped two inches from that. This is repeated until the wood is bent around the jig. Before clamping, check to make sure the wood has some give and push it into the form. The clamps are applied closer where the jig curves to force the wood into place.

They come out of the oven. Those clamps absorbed a lot of heat. The heat of the oven absorbed into the wood and turned the water into steam, this steam evaporated in the oven leaving only dry wood left. The temperature is set to 350 degrees. This is enough to prevent the wood for burning but hot enough to get rid of the moisture. This temperature is appropriate for the guitar side bending temperature as well.
Steam has been created in this process. But the steam was not critical to make the wood bend. The strips were thin and wet enough on their own to make the change with clamps.
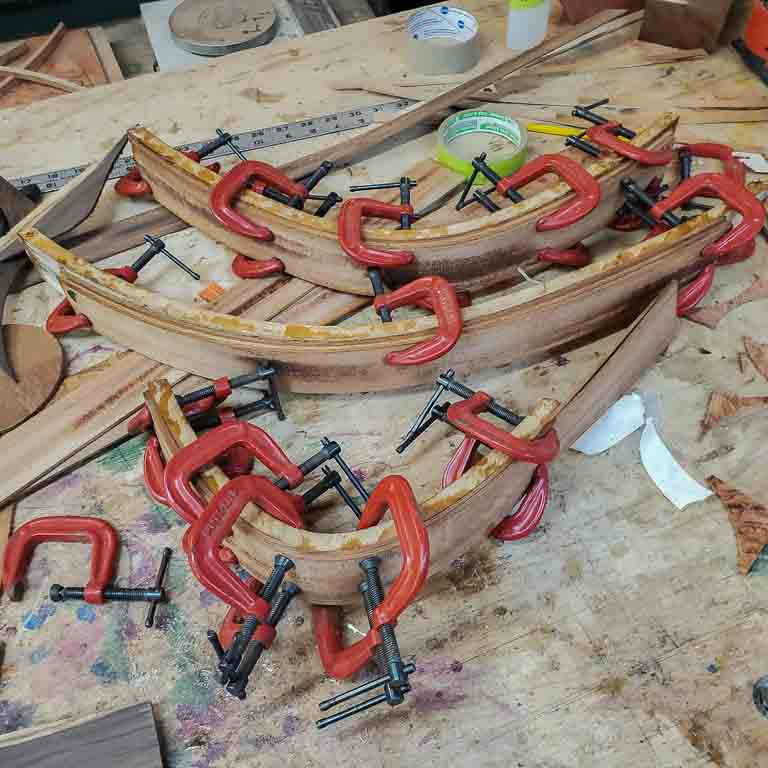
The jigs are left to cool down and hold the form. It would be a problem to release them from the jig now and have them relax back to a flatter position. If the pieces were wet this would surely happen. They are still pliable and don’t understand what shape we want them to be in. Therefore, we apply heat; it loosens the lignin, evaporates the water and makes the wood hold its shape. At a certain point this is true because we need to dry out the wood, it isn’t useful to use a wet mess.
The Bending Machine
The second method to guitar side bending is using a bending jig. This is called a fox bending machine with a few adjustments.
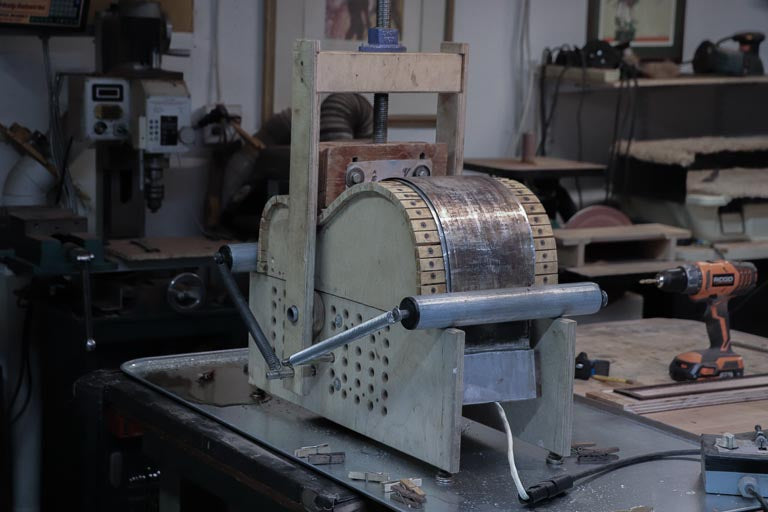
The idea is to bend the middle section of the side first by slowly applying pressure with the radial arm. A fixture that matches the curve of the side jig is pressed down into the wood by turning a large bolt then held in place. The piece of wood sites on a jig that has the same shape as the side that we want. To get the outer curves two rollers are used. They are held in place by two large springs fixed to the base.
We need to make this machine usable for many different sizes of guitars. We have many jigs that reflect the different body sizes that we used from a 17” bass down to a 6” super tiny model. The holes in the side allow the roller to be positioned in any place. This makes it easy to find a position to set the roller.
The side wood that we want to bend is placed into a heating blanket.

This is a 5-layer sandwich. There is a strip of aluminum flashing, the heating blanket, aluminum flashing, the side and more aluminum flashing. The heating blanket isn’t directly placed onto the wood.
Now comes the most important part: The water. The water is kept in a bottle with a squirting attachment. The water is poured onto the wood in the aluminum sandwich. The goal is to flood the wood and saturate it as much as possible. If there is an ample amount of water the wood will not burn. The heat will spend all its time evaporating the water,so, it won’t have time to burn the wood. The water acts as a heat conduit to evenly heat the wood. Water is continuously added. The heating blanket is turned on and put on a timer. Once about 5 minutes pass the wood sandwich is at a good temperature and begins to steam. Water is added where needed to keep it steaming.
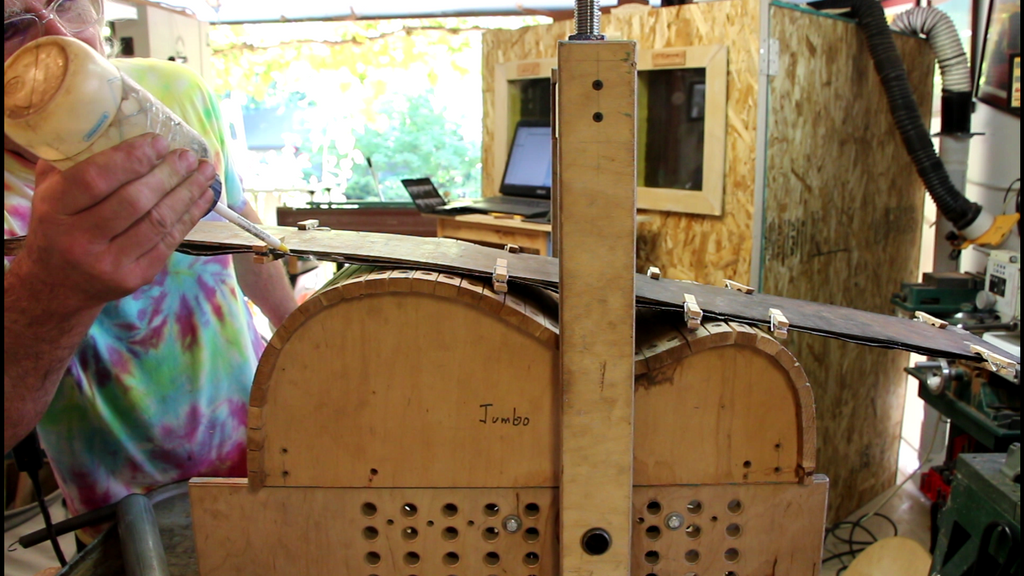
An interesting point to note is that when the water is added the wood doesn’t bend under it’s own weight. Only after the side starts getting heated up does the side began to collapse. It’s easy to see that the piece is ready to bend because the wings not on the mold sag down from their own mass. This shows that the heat is a necessary component to softening the wood.
The steam permeates the wood to make it pliable. It is placed on top of the side mold and the screw with the shoe is placed above it. The screw is slowly applied to the wood until it starts to bend. During this phase, the screw is rotated until maximum pressure is applied. One of the techniques used is to screw it in, wait a few seconds then release the pressure and move forward repeating staggered steps.
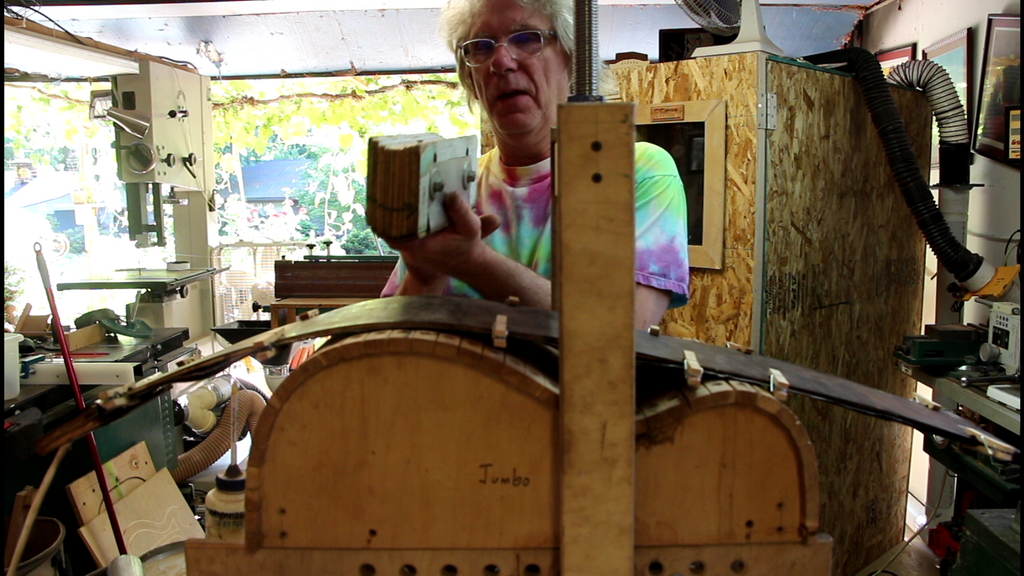
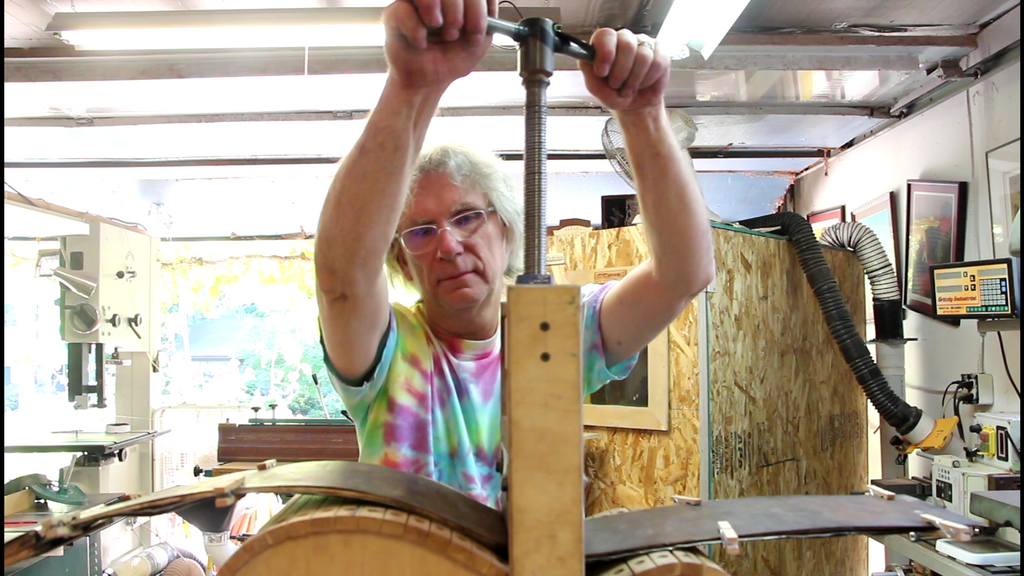
Once the main screw is down the rollers are rolled over the top and lower bout. The pressure is slowly applied to bend the remaining section down into place. Then they are held at the end to keep it in place.
The bend is completed and now it’s time to make sure it stays this way. This is where the heat helps the most. It will dry out the wood and make it conform to existing shape. The blanket is left on for a few minutes then turned off. The sides are kept in the fixture for around 30 minutes until all the heat has dissipated. At this point the sides are removed and clamped into the form mold.
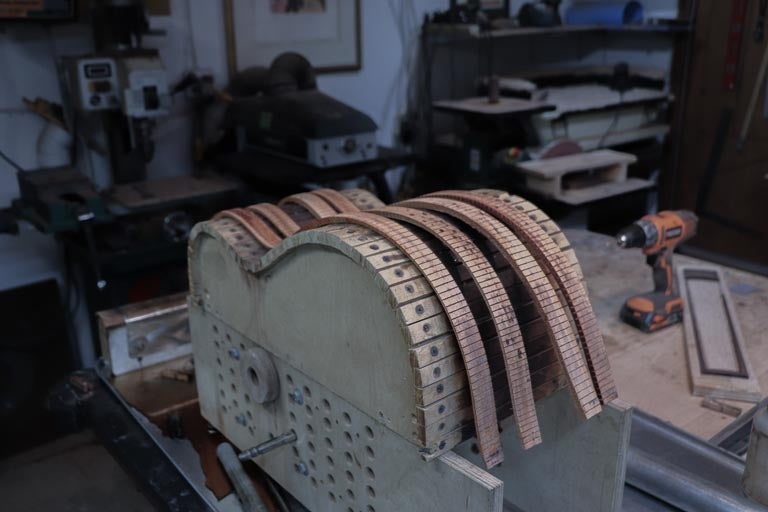
The sides are bent as well as the curfing. The curfing is already bendy because of the wood removed between each post. It’s still a good idea to send in through the bending machine to make it form the right shape. This is an easy job to do because it’s already flexible.
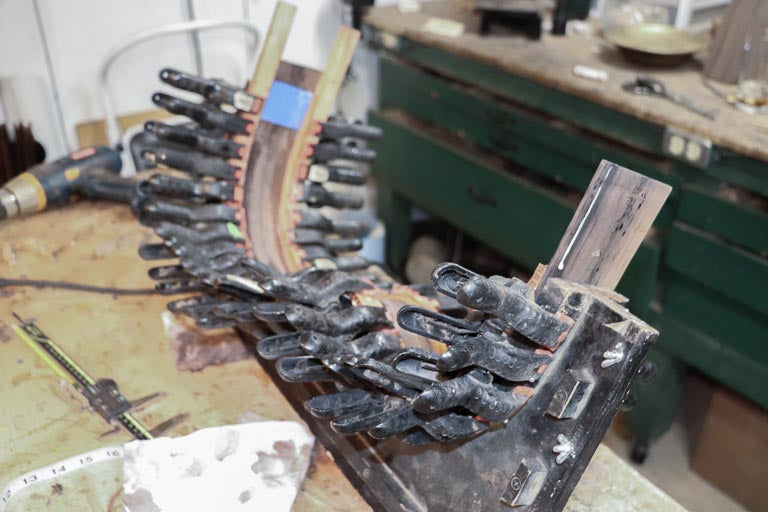
The wood is then returned to its mold and clamped into place. This is an important step to do to prevent the wood from relaxing back to its original position.
Conclusion
These are the two ways that we bend wood for guitars. One using only water and one using a combination of water and heat. It is possible to bend wood around soft curves using only water and clamps and tighter curves use fixtures and mechanical pressure. These methods are applicable to any way that wood is bent. First the wood is made to be hot and moist then it is conformed to a shape. It doesn’t matter what is being bent these are the steps to follow. Go slow when applying pressure and make sure that there is enough water in the system! It’s ok to break a few pieces, after all wood grows on trees.
Check out an article about the advantages of a handmade guitar and check out an article about guitar intonation